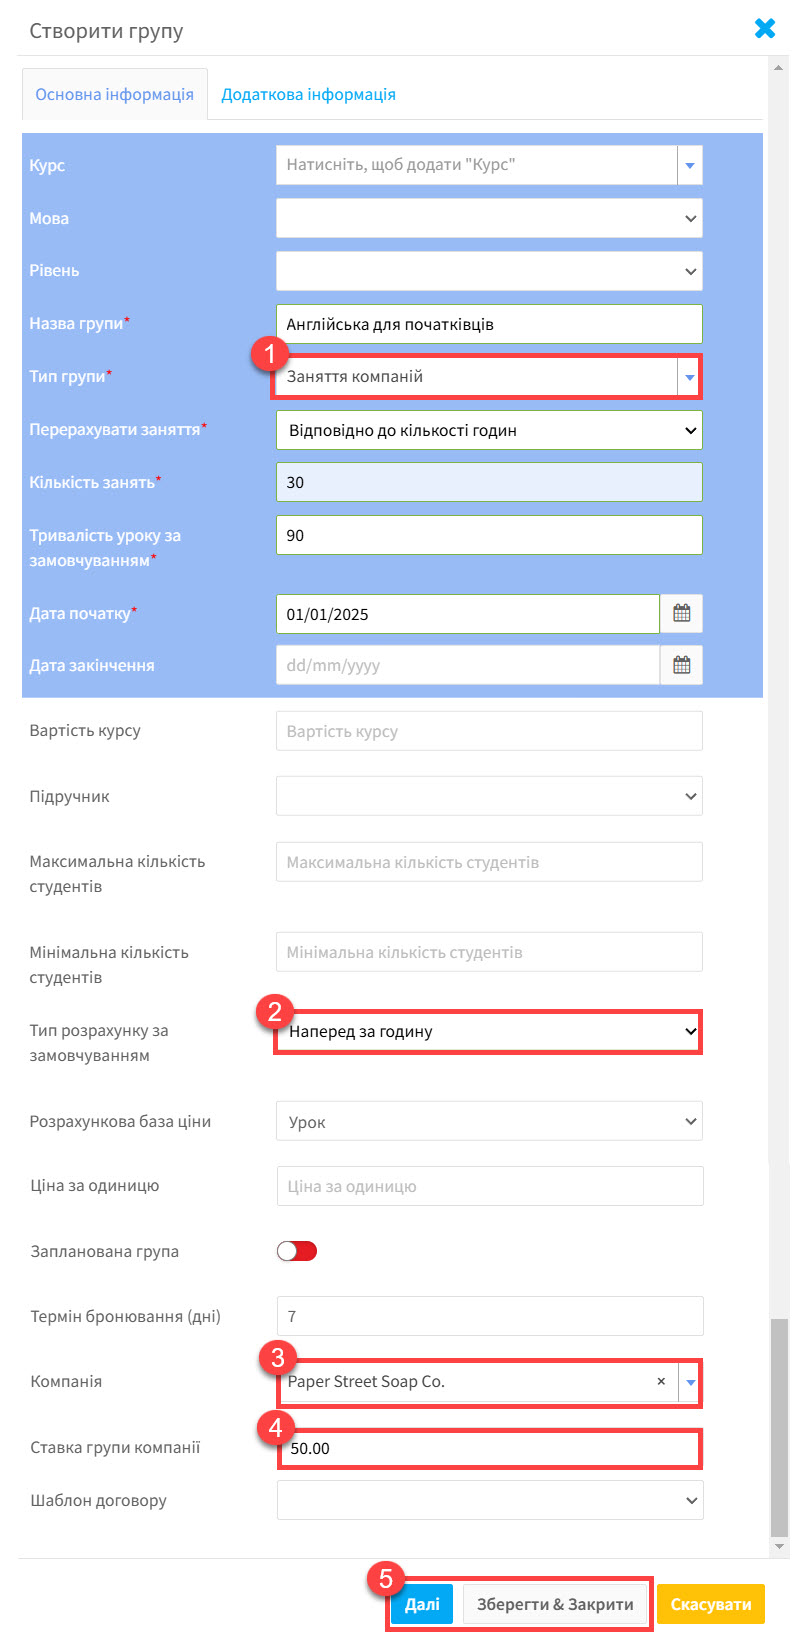
Цей процес дуже схожий на створення загальнодоступної групи, але є певні особливості:
- Тип групи – Оберіть заняття компаній.
- Оберіть тип розрахунку за замовчуванням. Що б ви не обрали, чи то розрахунок погодинно, чи за всі уроки, вам треба ввести ставку групи компанії за один урок.
- Оберіть компанію.
- Введіть ставку групи компанії за один урок.
- Якщо студенти, які будуть навчатися в групі вже додані до системи, натисніть на “Далі” і ви можете додати їх до групи зі списку студентів, який з’явиться. Якщо студенти ще не додані, натисніть на “Зберегти” і ви можете додати їх після створення.
Ми створили групу, але забули позначити що це група компанії. Що робити в такому випадку?
Перейдіть до розділу Адміністратор школи – Компанії:
- Знайдіть компанію для якої ви хочете створити групу.
- Перейдіть до вкладки Групи.
- Натисніть на “Призначити групу”.
Після того, як ви виконаєте всі кроки описані вище, список груп з’явиться у новому вікні. Виберіть групу або групи та натисніть на “Зберегти & Закрити”. Зараз вам лише необхідно додати ставку компанії. Оберіть “Редагувати ставку”, введіть суму та схваліть дію.
Ви повинні зробити ті самі дії при створенні індивідуальних груп і призначити їх до компанії.
Студента було додано до групи компанії, але він не відображається в списку студентів.
Якщо ви додали нового студента до групи компанії, він не буде відображений у списку, якщо ви його не додали до самої компанії. Перейдіть до розділу Компанії – Студенти та натисніть Записати студентів із груп.
Оберіть Так зі списку опцій, які з’являться і нерозподілені студенти з груп фірми будуть призначені до компанії:


