When you add a student to the system, they are automatically assigned a login and password to the Academic Module. There are a number of ways to provide these details to the student.
Printing:
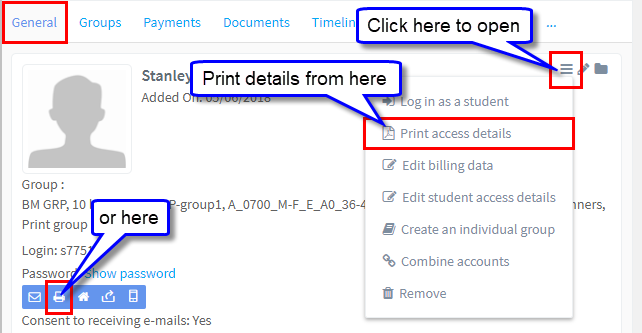
Go to School Admin Module – Students and select the student. On the General tab on the right-hand side of the screen, you will find “Print access details” button, plus it is also in the drop-down menu. If you created an account for the student’s parent, these access details will also be printed.
Emailing to a Student:
You can also send the student’s access details in an email. Obviously, you must have entered the e-mail address on the student’s and/or student’s parent’s card. Go to School Admin Module – Students and select the student. On the General tab on the right-hand side of the screen, there is a “Send access details” button.
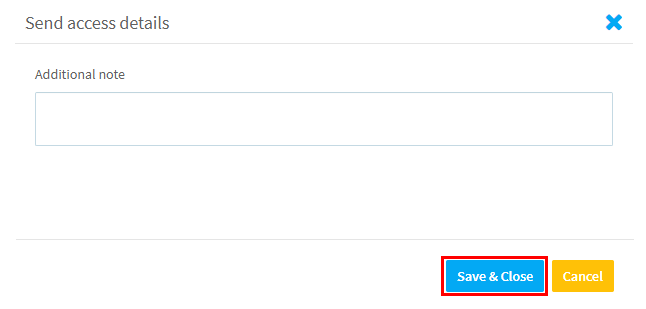
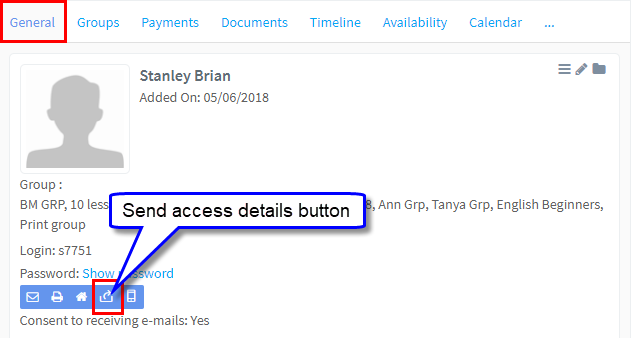 After clicking the button, a new window will appear. Here you can enter any additional information that you want to include in the email. A message with access details has predetermined content, but you can simply add something of your own.
To confirm sending the email (irrespective of whether you add additional message or not), click on the Save and Close button. After the message is sent, the button will change its colour from blue to green (you will need to refresh the page to see this change), so that you know which students have been sent access details.
Emailing to a Group:
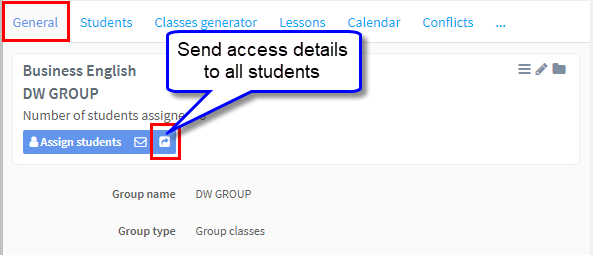
You can also send emails with access details to all students in a particular group. Go to School Admin Module – Groups and select the group. On the General tab on the right-hand side of the screen, click on the “Send access details to all students” button.
Emailing to all (or selected) users in the school:
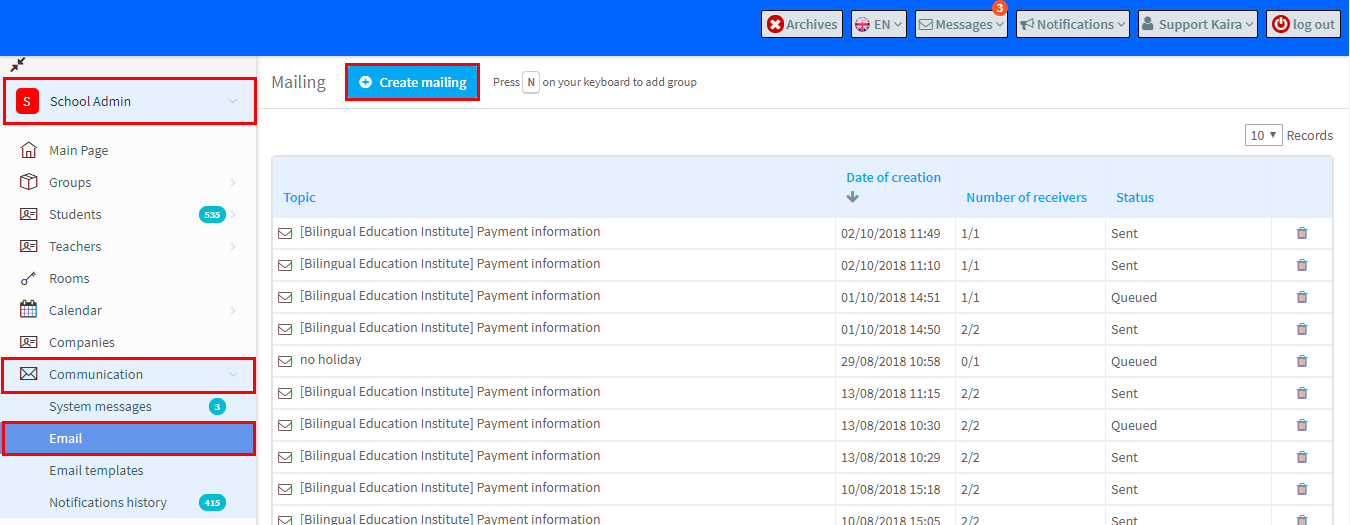
If you want to send log in credentials to teachers, students and parents and other users by email at the same time, go to:
School Admin – Communication – Email – Create Mailing.
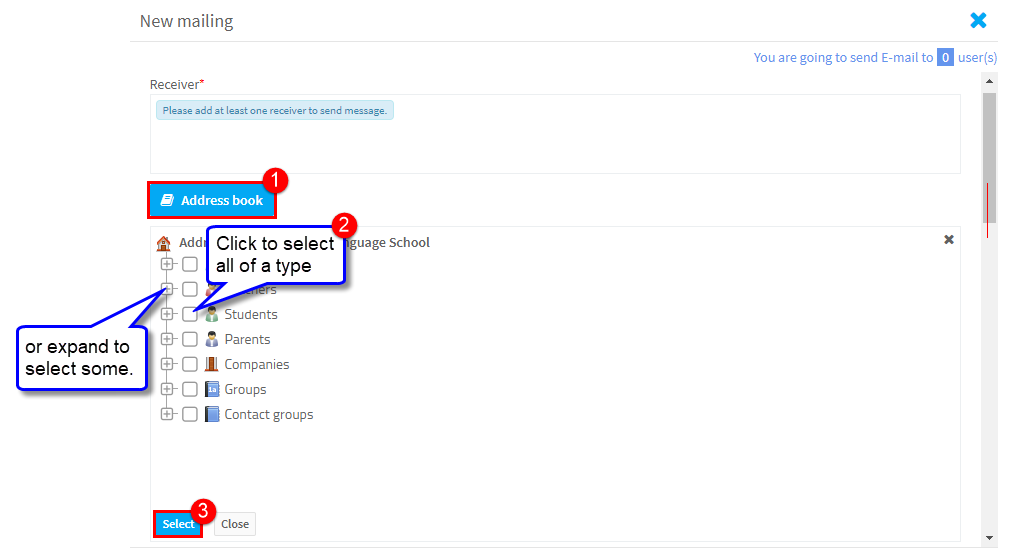
Now you need to select who you want to send log in details to:
- Open the address book.
- Select the people you want to email.
- Click Select.
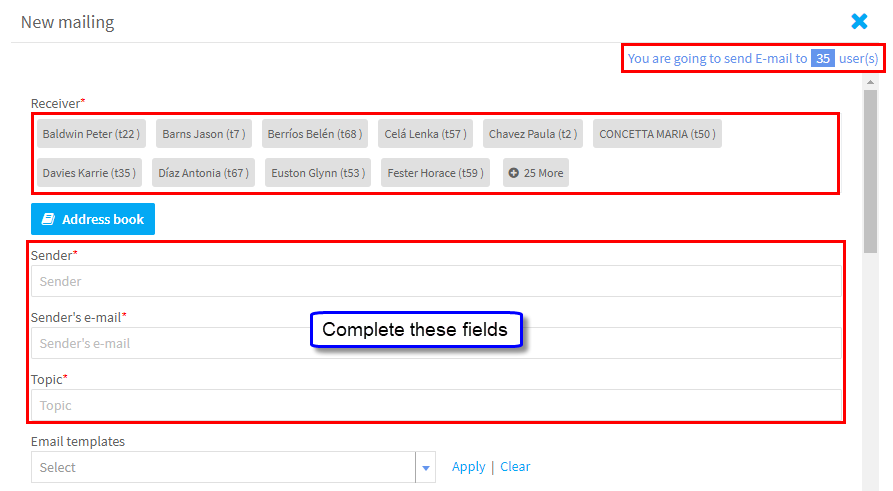
The receivers of the email will appear in the top box and you must fill in the Senders details
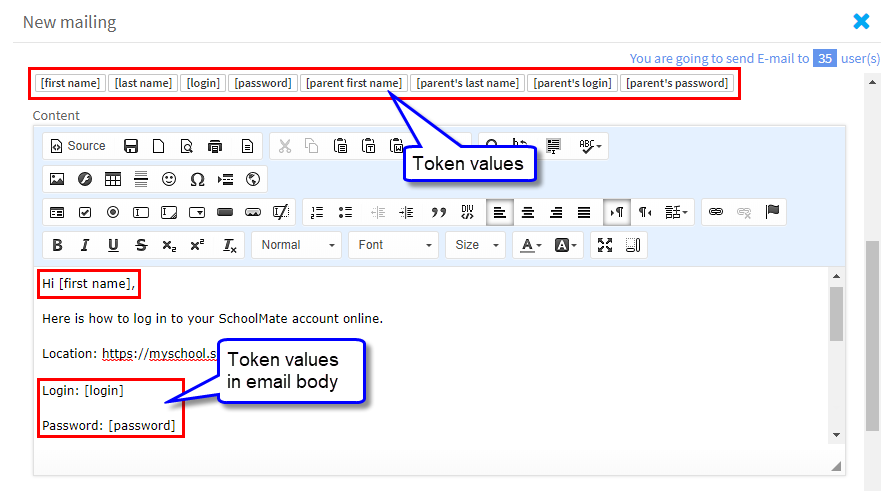
Token values
These allow you to personalise each email. Each recipient will get an email address to them and their own log in details.
Here is an example:

