Модуль CRM створений, щоб ви мали змогу записувати та планувати комунікацію зі студентами, батьками, компаніями та потенційними студентами.
Існує 2 головні секції в меню:
- ЗАВДАННЯ – тут ви можете знайти список завдань, які необхідно виконати та завдання, які треба створити. Ви можете дізнатись як створити завдання тут.
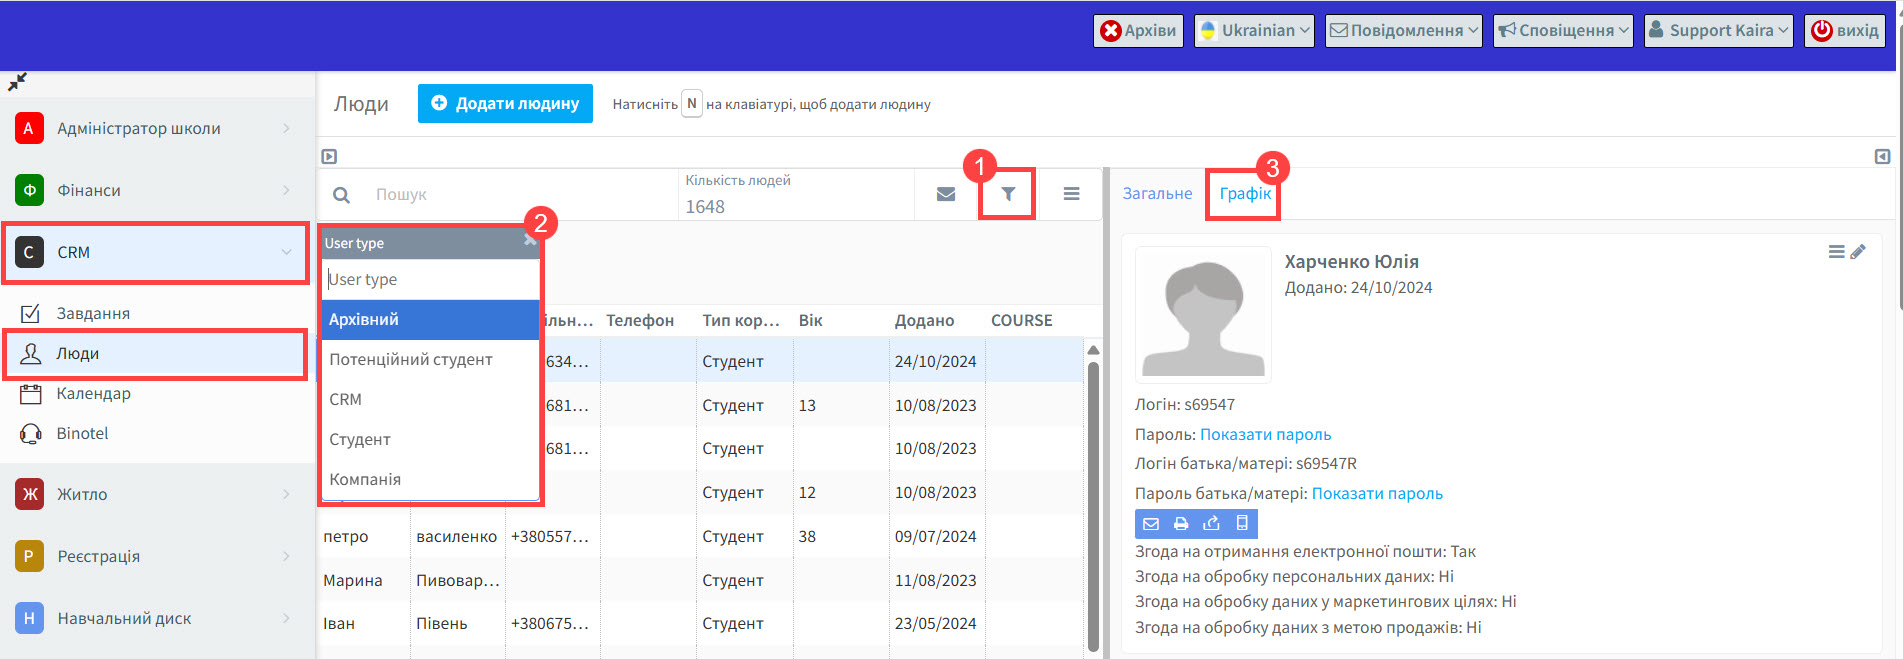
- ЛЮДИ – усі наявні контакти: студенти та контакти компаній (як архівовані, так і не архівовані), автоматично з’являються у списку CRM. Ви з легкістю можете знайти студента за типом користувача: студент, компанія, архівовані, у списку. Батьки не мають своєї окремої картки, але їх можна знайти та надіслати імейл за допомогою фільтрів.
У цьому посібнику ми розглянемо секцію Люди.
Люди:
- Натисніть на фільтр та оберіть тип користувача.
- Ви можете обрати тип користувача, якого шукаєте та надіслати цій групі електронного листа і т.д.
- Будь-які завдання, які ви створили з’являться тут.
Нові контакти:
На додаток, ви можете створити картку в модулі CRM для потенційних клієнтів
заповнити їх деталі, так само як для студента і зберегти. Коли потенційні клієнти реєструються в школі, ви можете перетворити їх в активних студентів, натиснувши на “Додати студента”.
Тепер вони матимуть і картку студента, і картку в CRM.
Графік:
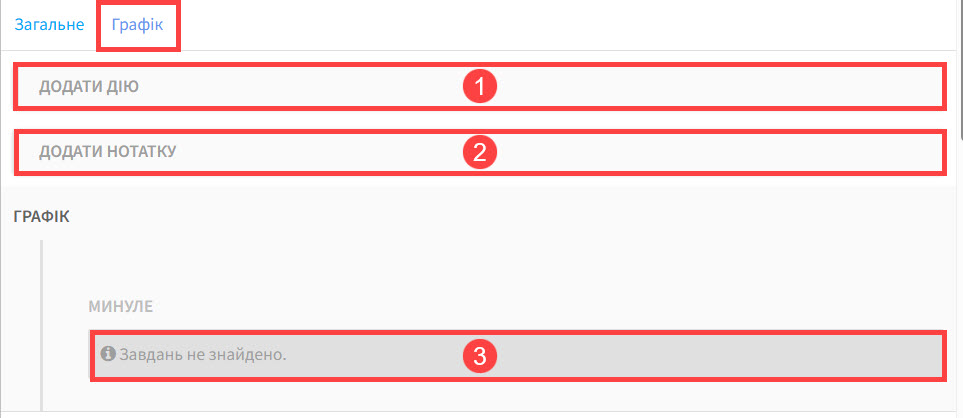
Картка “Графік” показує історію всіх завдань, які були створені для цієї людини. Ви можете створити їх у завданнях або тут:
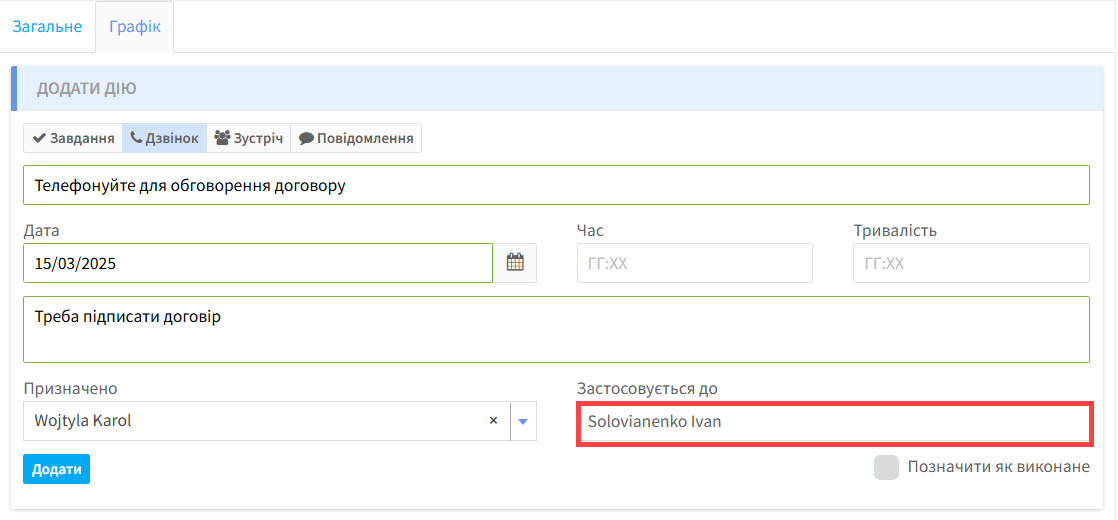
- Функція “Додати дію” є такою самою, як описано в завданнях, окрім того, що вам не потрібно обирати, для кого це завдання призначено. Завдання автоматично буде призначено людині, кому належить картка.

- Додати нотатку можна для коментарів про студента.

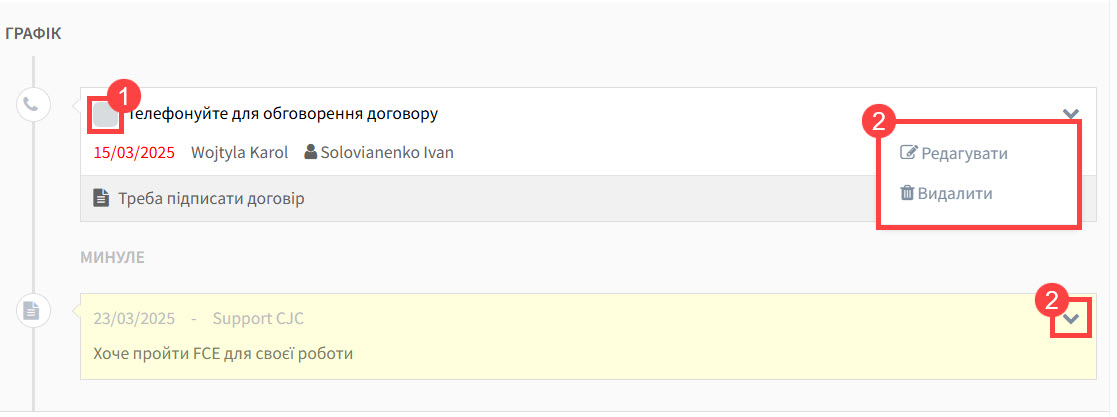
- Графік показує історію комунікації та примітки.
1. Натисніть, щоб позначити завдання як виконане.
2. Кнопка редагування.
Картка “Графік” також доступна, коли ви шукаєте картку студента.


