The CRM module is designed to let you record and plan your contacts with your students, parents, company contacts and potential students.
There are two main sections in the menu:
- TASKS –Tasks can be created by school administrators as reminders for themselves to do something or they can be created and assigned for other school administrators who will see them when they log into their account.
- PEOPLE – All existing contacts: students and company contacts, whether archived or not, automatically appear in the CRM list. You can also add prospects who are not students. You will find more information here.
In this tutorial we will look at tasks.
Tasks:
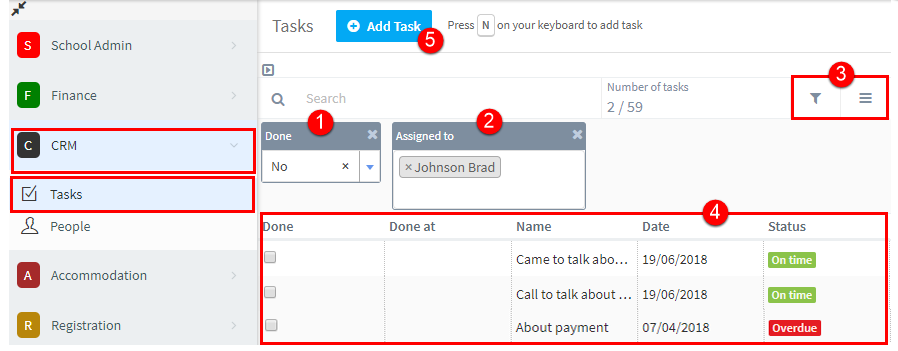
When you open Tasks, the default settings is tasks assigned to you which have not been done.
- Outstanding tasks.
- Your name.
- Filters and settings.
- Tasks.
You can change what appears by closing the boxes – click the Xs – or using the filters and settings, and the tasks will appear in the centre of the screen.
Creating a Task:
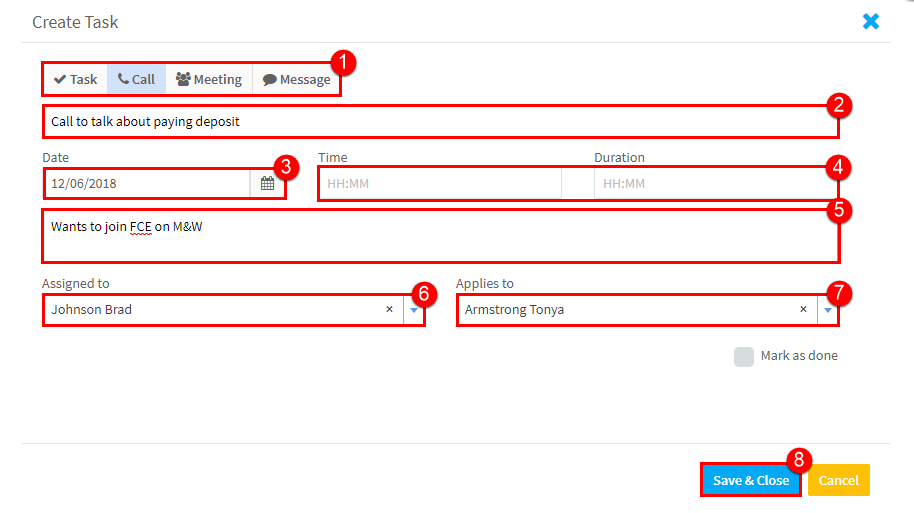
Click “Add Task” (see number 5 above).
- Select the type of task it is.
- Add a title.
- Choose the date it is to be done.
- Time and Duration are optional.
- Add a description.
- Select from the drop-down which admin person in the school will be given this task.
- Select which student or company this task is related to.
- Click “Save & Close”.
Creating a Card:
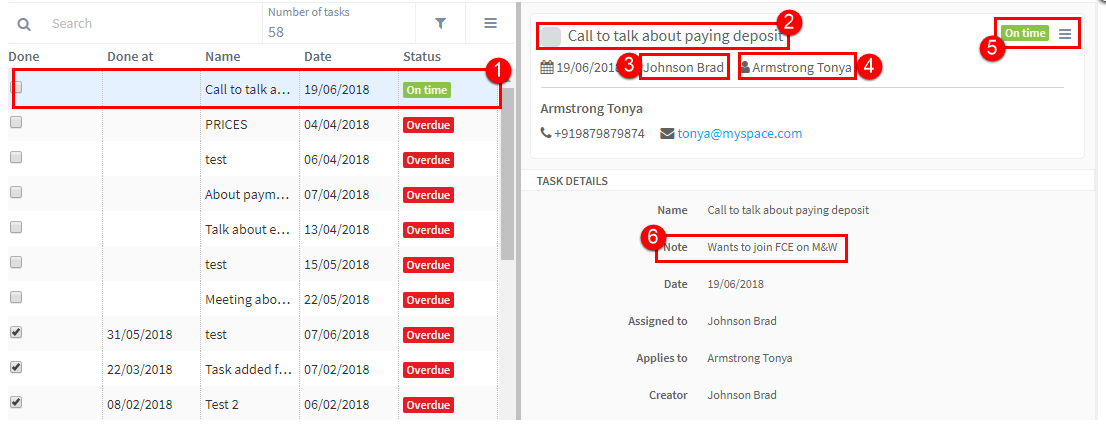
After you click “Save & Close” a card will be created:
- Listed in centre of screen.
- The title.
- The School Administrator it is assigned to.
- The student or company.
- Status and Edit button.
- The note about the task.
If you want to edit or mark it as complete:
- Click this box.
Or
. 2. Click “Edit task” and then click “Mark as done”:
Tasks and cards:
All of the tasks that you create for a student or company will appear on their timeline card, so you will have a history of contacts etc.,


