The Student’s history card stores the assessments of the students including comments, grades etc., This what it looks like before anything is added:
Test Results:
Tests which the student has completed, either through the Registration Module, or which have been shared with the student by their teacher, will have the results shown here.
Adding Notes to the Card:
Notes can be added by School Admin by clicking the “Add note” button above.
Notes can also be added by the group teacher when they log in. They can either use the Groups or Students menu item to get to the student.
When they click on the Student History icon the following page will appear and they can click on “Add note” to add their assessments.
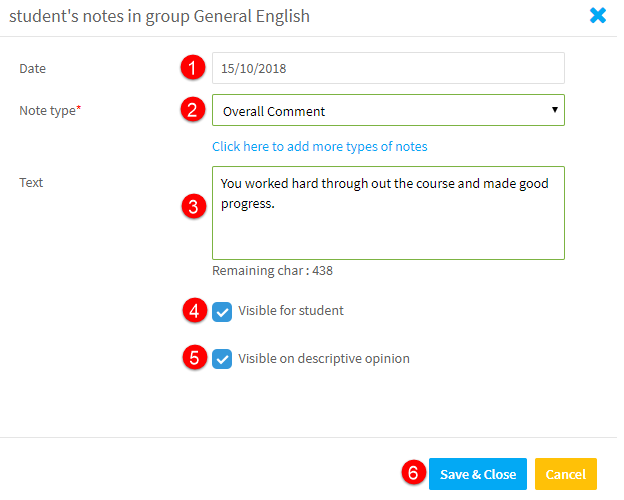
When the “Add notes” button is clicked a card will appear:
- That day’s date will be filled in.
- Select the subject that a note will be added about.
- Enter the comments.
- Click this if you want the student to be able to see the comments when they log in.
- Click this if you want the comment on the printed assessment.
- Click Save & Close.
You can continue adding as many comments as you wish by repeating the above.
Printing the Assessment:
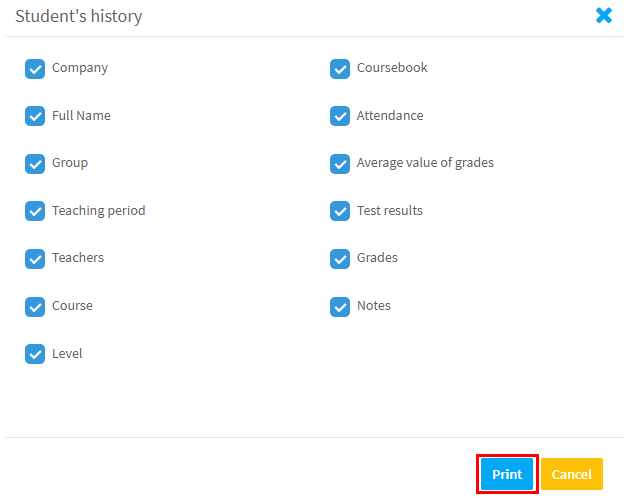
After you click Save & Close then click “Print descriptive opinion”:
 You will be asked what items you want to appear on it:
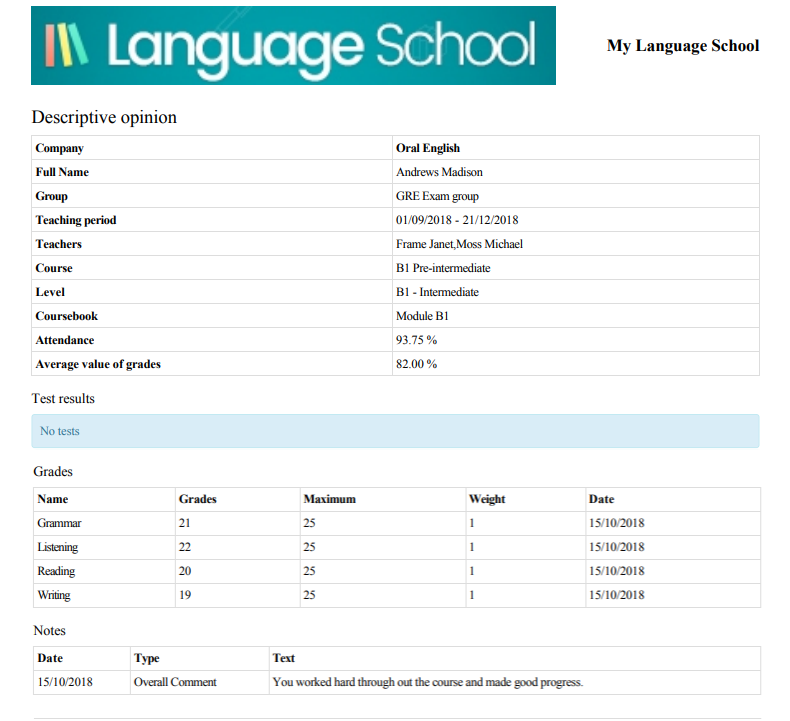
After you click Print the assessment will appear:
Bulk Printing Assessments:
If you want to print assessments for more students at the same time, use the mass print option.
- Go to Students.
- Filter the students to show only those whom you want assessments for.
- Click Print.
- Select “Descriptive Opinion” from the drop-down menu.
Select which items you want to appear (see above) in the assessment and click “Print”.
Other Points:
- Students can see their assessments when they log in and click here:


